
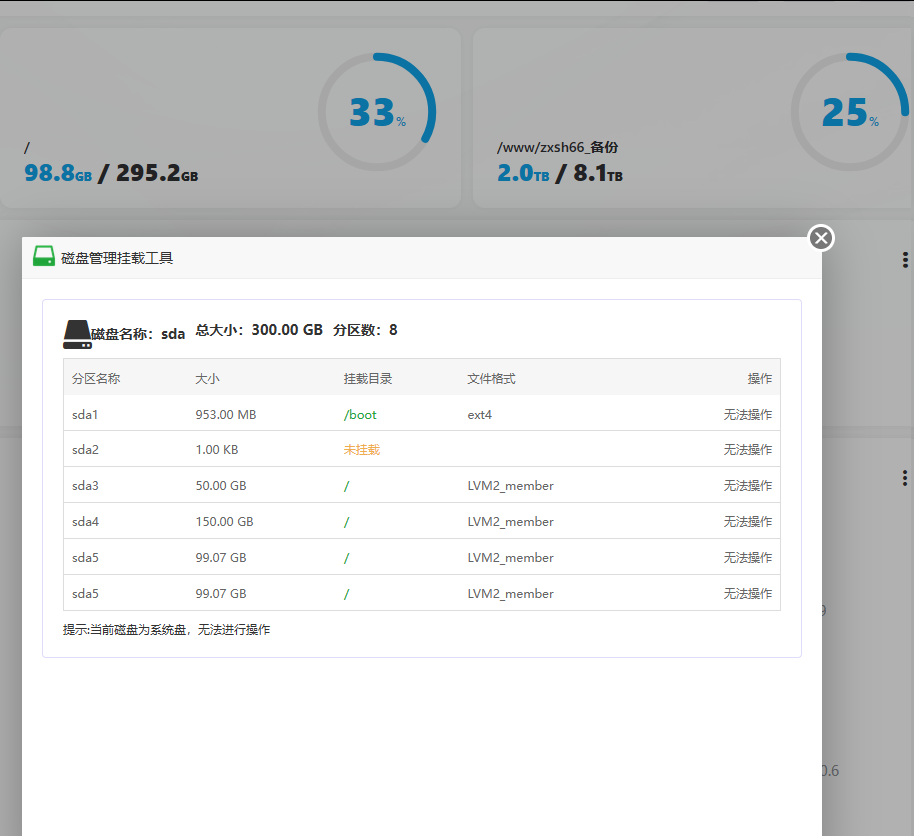
常用命令
    lsblk                  # 查看所有块设备
    df -h                  # 查看文件系统挂载情况
    pvdisplay              # 查看物理卷(PV)
    vgdisplay              # 查看卷组(VG)
    lvdisplay              # 查看逻辑卷(LV)
在云服务商在线增加硬盘容量后系统并不能自动增加容量,我们需要在系统后台手动操作:
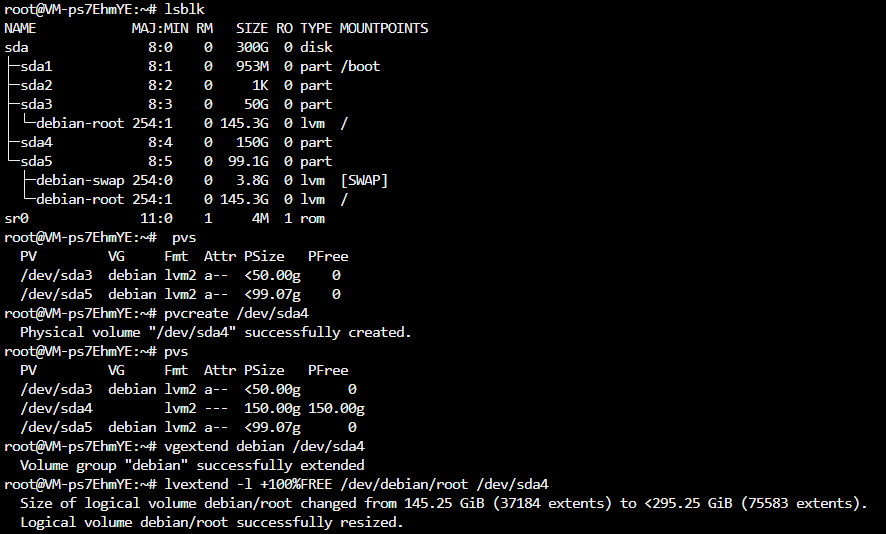
通过 lsblk 发现容量有300G,但是分区使用只有sda3的50G 和 sda5的100g
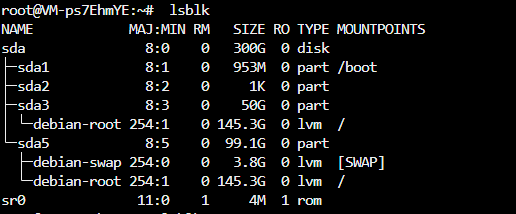
那么应该还有剩余空间没有使用,我们需要使用分区工具手动再把剩余空间分区然后添加到我们的卷组
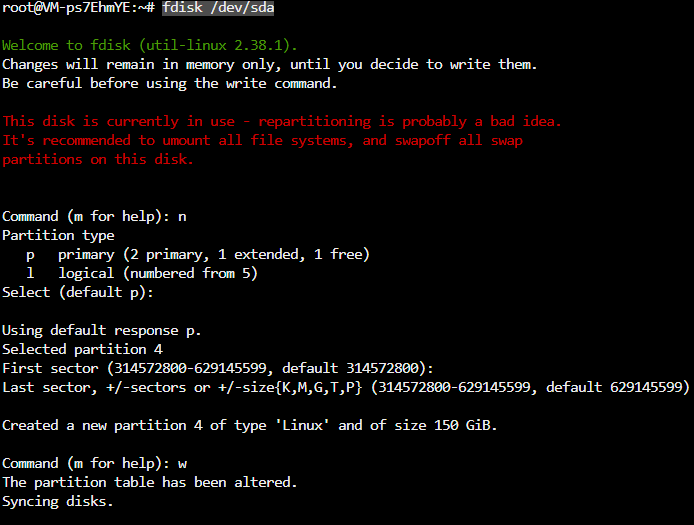
sudo fdisk /dev/sda 进入交互界面后依次操作: 输入 n 新建分区 选择分区类型 p(主分区) 分区号输入 4 起始扇区直接回车使用默认值 结束扇区直接回车使用默认值(占用全部剩余空间) 输入 t 修改分区类型,选择分区 4,输入 8e 设置为 Linux LVM 输入 w 保存并退出
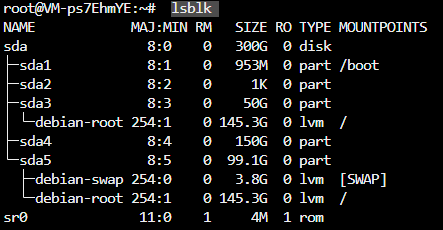
再次lsblk 命令查看所有设备,我们发现剩余的150G已经成功分配给sda4了
创建一个物理卷组 pvcreate /dev/sda4
root@VM-ps7EhmYE:~# pvcreate /dev/sda4
输出如下表示成功
Physical volume "/dev/sda4" successfully created.
使用PVS命令查看 卷组情况
root@VM-ps7EhmYE:~# pvs
  PV         VG     Fmt  Attr PSize   PFree
  /dev/sda3  debian lvm2 a--  <50.00g      0
  /dev/sda4         lvm2 ---  150.00g 150.00g
  /dev/sda5  debian lvm2 a--  <99.07g      0
发现sda3 和sda5 都加入了debian卷,那么我们把新添加的sda4 也加入dabian
root@VM-ps7EhmYE:~# vgextend debian /dev/sda4
  Volume group "debian" successfully extended
分配新的分区全部容量到根分区
    root@VM-ps7EhmYE:~# lvextend -l +100%FREE /dev/debian/root /dev/sda4
    创建成功的输出如下:
      Size of logical volume debian/root changed from 95.25 GiB (24385 extents) to 145.25 GiB (37184 extents).(逻辑卷 debian/root 的大小已从 95.25 GiB(24385 个区段)更改为 145.25 GiB(37184 个区段)。)
      Logical volume debian/root successfully resized.   (逻辑卷 debian/root 已成功调整大小。)
df -h 查看发现容量没有增加,因为我们还没有扩容文件系统
扩容文件系统 xfs_growfs /dev/mapper/debian-root
再次df -h 发现成功扩容
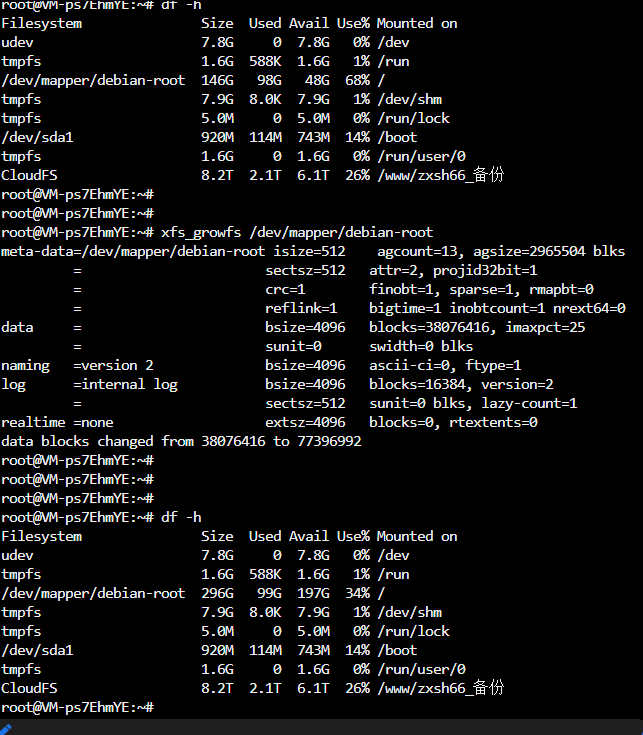
验证扩容结果
    df -h
    lsblk



发表评论