
1、简述:
1)nps:是一款轻量级、高性能、功能强大的内网穿透代理服务器
2)功能:目前支持tcp、udp流量转发,可支持任何tcp、udp上层协议(访问内网网站、本地支付接口调试、ssh访问、远程桌面,内网dns解析等),此外还支持内网http代理、内网socks5代理、p2p等,并带有功能强大的web管理端。
3)优点:与Frp类似,但是具有图形化管理界面,更方便配置
4)工具:
client代表客户端:放到内网主机
server代表服务端:放到公网服务器上
安装命令如下:
sudo chmod 777 nps
./nps install     #linux
nps.exe install   #windows
++++++++++++++++++
安装完成后可以用命令
nps start  #启动
nps stop  #停止
nps restart  #重启
nps uninstall   #卸载
nps update or nps  nps-update updat #升级
./nps reload  #重新载入配置
sudo nps status # 查看服务端状态
sudo npc status # 查看客户端状态++++++++++++++++++
彻底卸载:不再使用时,改配置或彻底不用的停止服务:sudo nps stop 或 nps.exe stop 再 nps uninstall,重新注册前必须卸载旧服务 更新也是同理,服务模式下更新客户端的正确方法:停止服务:sudo nps stop 或 nps.exe stop执行更新命令重新启动服务 ,linux安装后 会自动把文件放到 /etc/nps /usr/local/bin 这两个文件夹里面
NPS和FRP都是主流的开源内网穿透工具,核心区别在于设计理念和管理方式:NPS侧重集中化Web可视化管理,配置热更新、多用户权限控制更省心;FRP侧重轻量灵活和模块化,协议支持更全面、资源占用更低。
选型上不用纠结,看你的使用场景:日常个人或小团队用、需要频繁改规则、非技术人员也要参与管理,直接选NPS;跑在树莓派这类低配设备上、追求极致性能和深度定制,FRP更合适。
核心差异对比
架构与管理:NPS采用集中式管理,所有配置都在服务端Web界面(默认8080端口)完成,客户端只是个纯Agent,新增规则后客户端自动同步,无需重启;FRP是经典C/S架构,所有配置靠客户端ini文件,每次改规则都要手动改配置并重启。
资源占用:FRP更轻量,客户端内存占用可控制在8MB以内,典型场景约12MB;NPS因带Web控制台,内存开销约28MB,增加约15%。CPU负载和线程数NPS也略高。
原版已经于2020年停止更新,https://github.com/yisier/nps/releases 这个是yisier维护的社区版本
·基于【宝塔+NPS】内网穿透搭建教程
下载服务端
https://github.com/ehang-io/nps/releases
我这里选择linux_amd64_server.tar.gz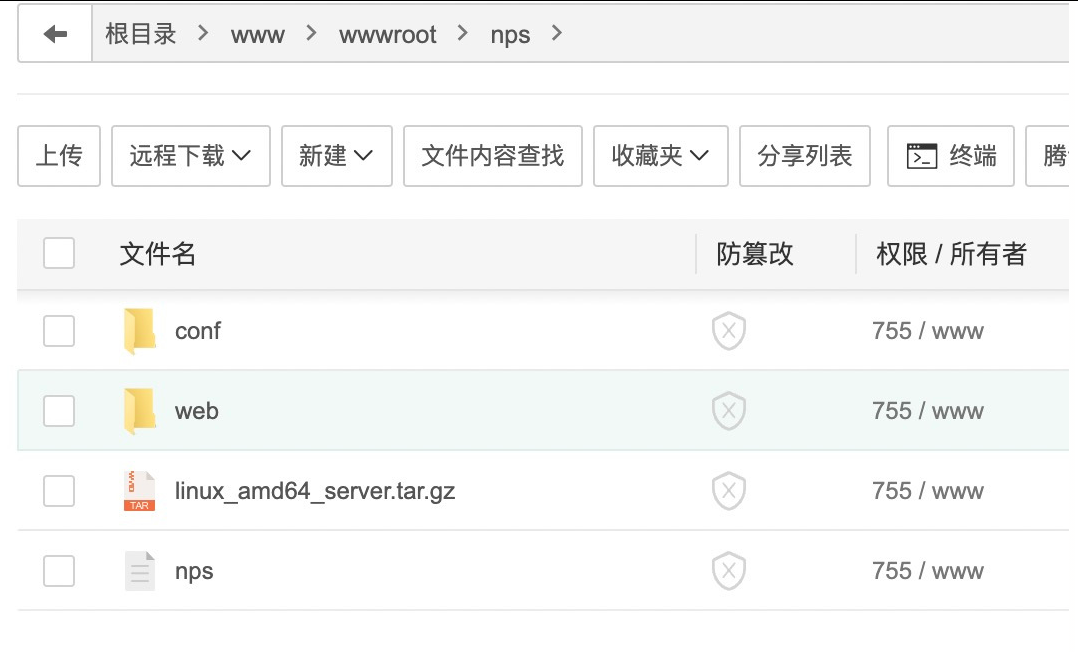
执行安装命令
sudo ./nps install
安装后修改/etc/nps/conf下的文件不是解压里的
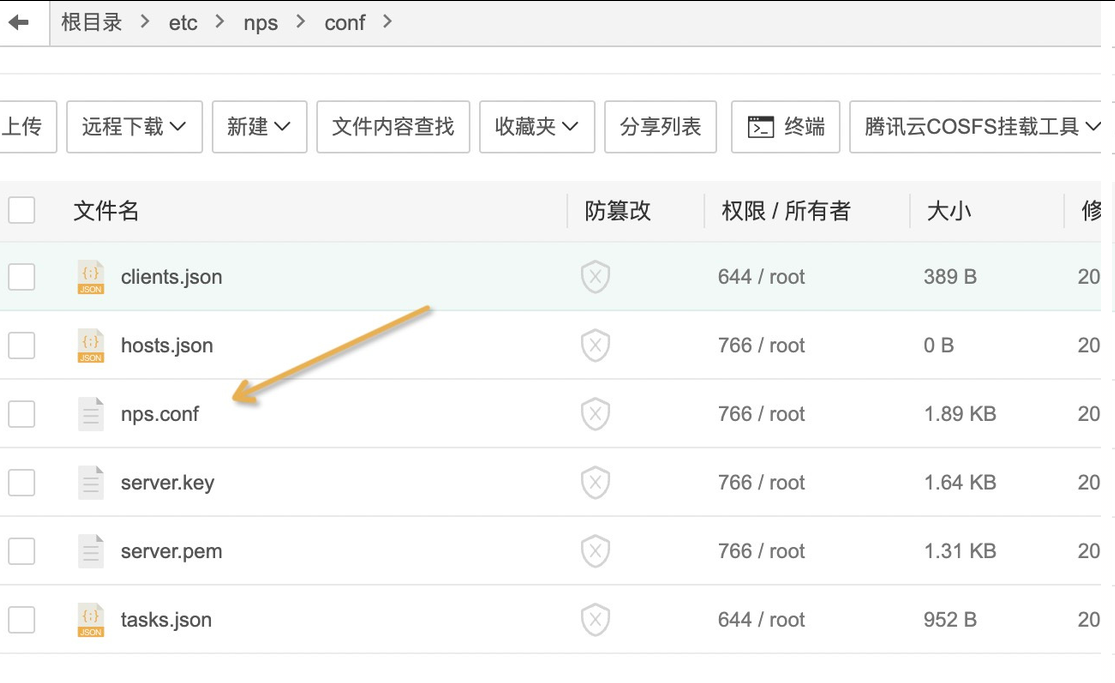
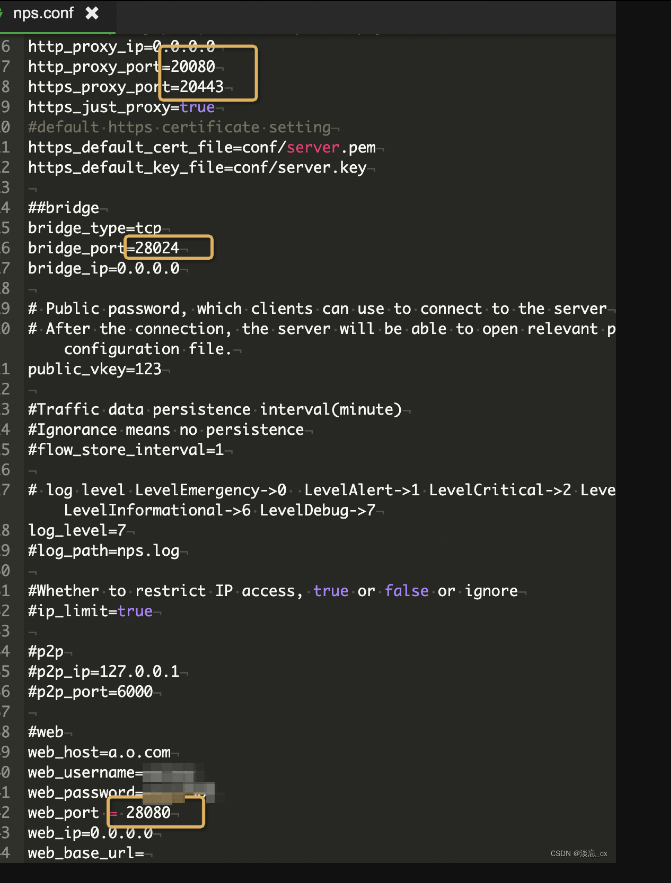
然后修改里面的4处内容
宝塔docker在这里

安装 nps
运行 nps 容器,并设置开机自启动
docker run -d --restart=always --name nps --net=host -v /etc/nps/conf:/conf ffdfgdfg/nps
此时 nps 服务端已经安装完成,可以通过docker ps查看是否运行成功。
浏览器访问http://服务器 IP:28080,输入配置文件中设置的用户名和密码即可进入 web 管理端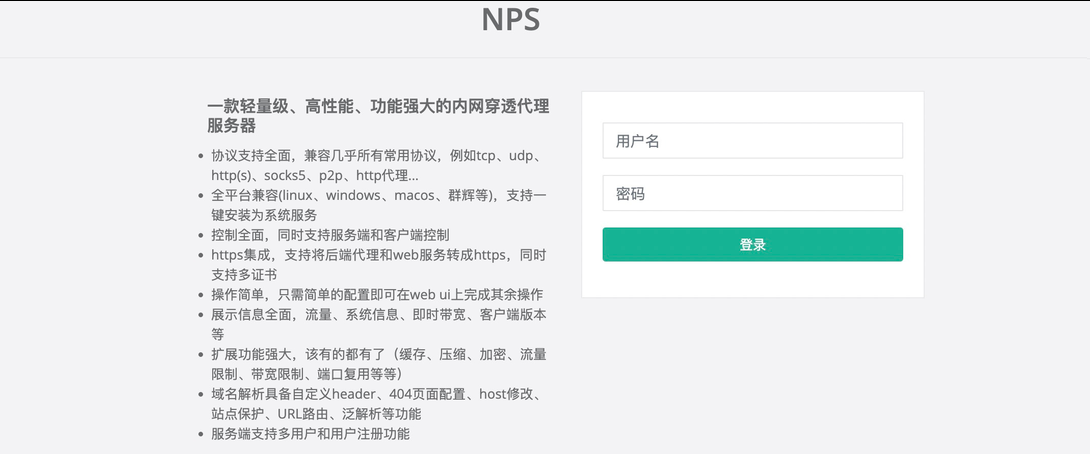
https://blog.csdn.net/weixin_44646977/article/details/134313668
·Nps(linux服务端手动配置)内网穿透搭建教程
下载服务端,下载地址:https://github.com/ehang-io/nps/releases/
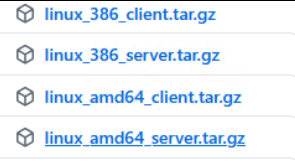
地址:
https://github.com/ehang-io/nps/releases/download/v0.26.10/linux_amd64_server.tar.gz
https://github.com/yisier/nps/releases/download/v0.26.40/linux_amd64_server.tar.gz (64位86CPU的 linux服务端端)
https://github.com/ehang-io/nps/releases/download/v0.26.10/windows_amd64_server.tar.gz (64位86CPU的 windows服务端端)
https://github.com/ehang-io/nps/releases/download/v0.26.10/linux_amd64_client.tar.gz (64位86CPU的 linux客户端)
2.把服务端传输并解压到自己的linux服务器里面,并且远程终端登录 后 用 CD 命令到程序文件位置 (我放到的是 /www/nps 目录的)
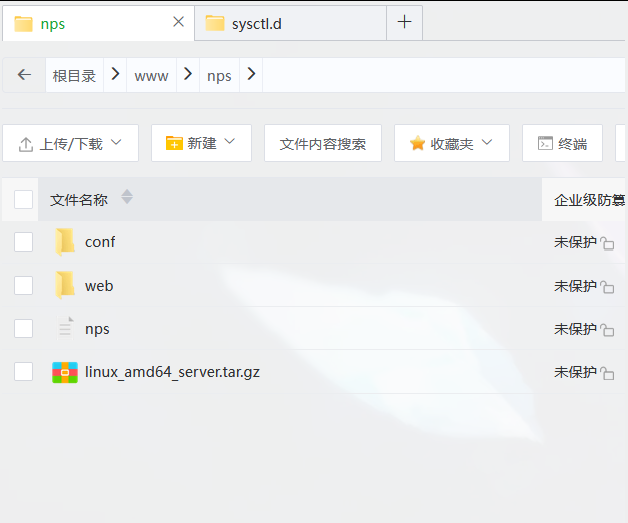
3.先给nps权限sudo chmod 777 nps(不然会报错:被拒绝
sudo chmod 777 nps
./nps install #linux
nps.exe install #windows
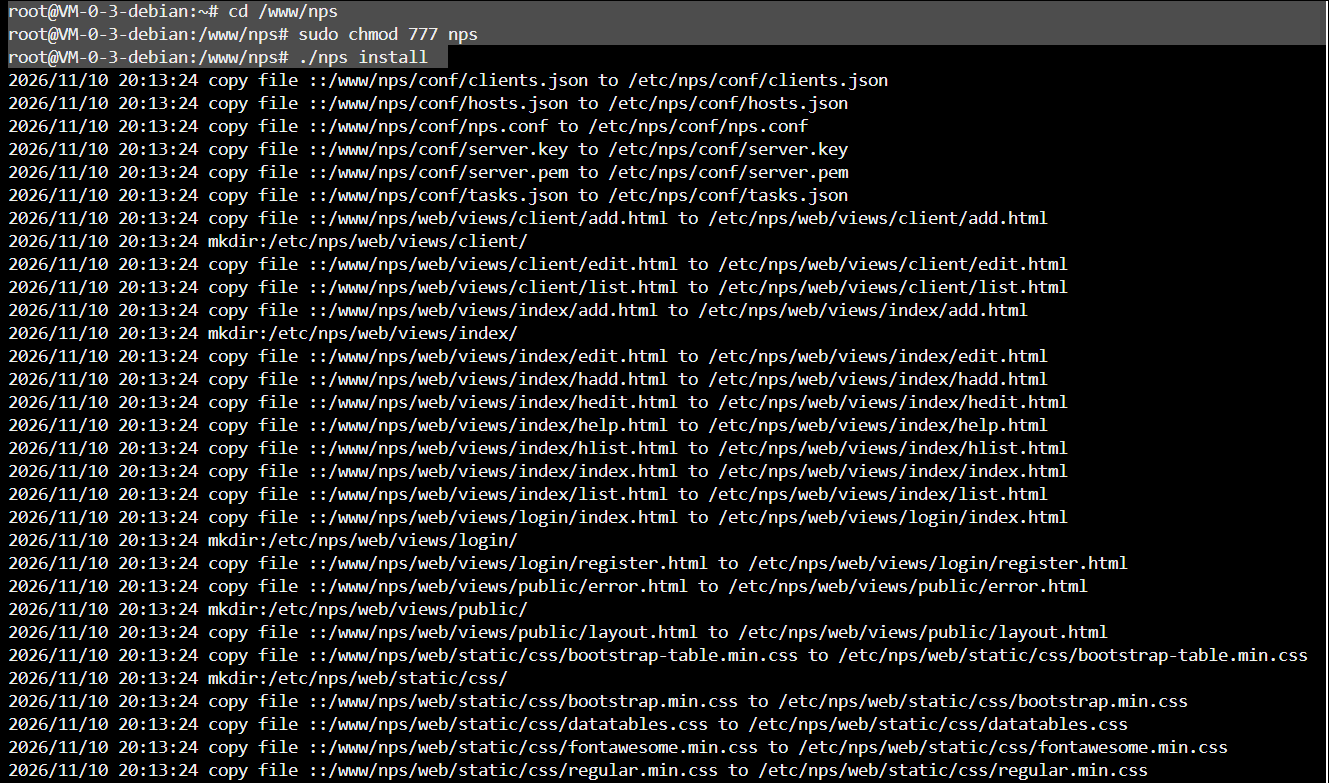
安装成功会提示
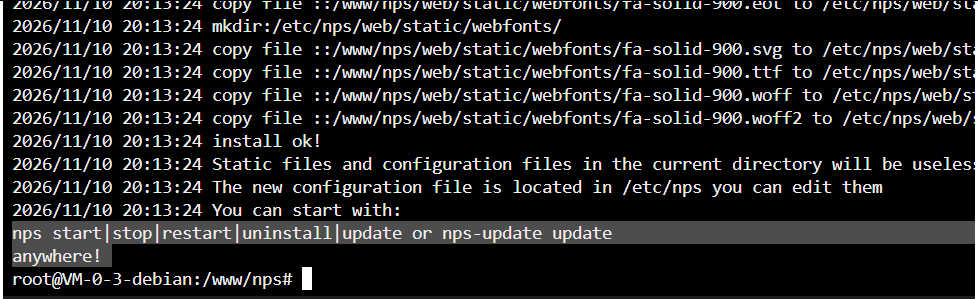
nps start|stop|restart|uninstall|update or nps-update updateanywhere!
(安装完成。
可以用命令
nps start  启动
nps stop  停止
nps restart  重启
nps uninstall   卸载
nps update or nps  nps-update updat 升级
./nps reload  重新载入配置 )
如果连接失败:当启动连接失败的时候一般都是端口被占用,我们可以修改端口,然后重新载入配置在启动。
重载配置文件命令:
./nps reload
4.修改配置文件
地址在 /www/nps/conf/nps.conf
可以使用
cd conf
vim nps.conf 或者 nano nps.conf
按i进行编辑
appname = nps

#HTTP(S) proxy port, no startup if empty
http_proxy_ip=0.0.0.0
http_proxy_port=80          #域名代理http代理监听端口(修改端口,避免冲突)
https_proxy_port=443        #域名代理https代理监听端口(修改端口,避免冲突)
https_just_proxy=true
#default https certificate setting
https_default_cert_file=conf/server.pem
https_default_key_file=conf/server.key

##bridge
bridge_type=tcp            #客户端与服务端连接的协议
bridge_port=8024           #服务端客户端通信端口(即客户端访问服务端的端口)
bridge_ip=0.0.0.0

# Public password, which clients can use to connect to the server
public_vkey=123        #客户端以配置文件模式启动时的密钥,设置为空表示关闭客户端配置文件连接模式

#Traffic data persistence interval(minute)
#Ignorance means no persistence
#flow_store_interval=1

log_level=7                 #日志输出级别
#log_path=nps.log

#Whether to restrict IP access, true or false or ignore
#ip_limit=true              #是否限制ip访问,true或false或忽略

#p2p
#p2p_ip=127.0.0.1           #服务端IP,使用p2p模式必填
#p2p_port=6000              #p2p模式开启的udp端口

#web
web_host=a.o.com            #需要修改,改为服务器ip
web_username=admin          #web界面管理账号(可修改)
web_password=123            #web界面管理密码(可修改)
web_port = 8080             #web管理端口,访问该端口可以访问NPS后台(可修改)
web_ip=0.0.0.0
web_base_url=               #web管理主路径,用于将web管理置于代理子路径后面
web_open_ssl=false
web_cert_file=conf/server.pem
web_key_file=conf/server.key
# if web under proxy use sub path. like http://host/nps need this.
#web_base_url=/nps

#Web API unauthenticated IP address(the len of auth_crypt_key must be 16)
#Remove comments if needed
#auth_key=test                          #web api密钥
auth_crypt_key =1234567812345678        #获取服务端authKey时的aes加密密钥,16位

#allow_ports=9001-9009,10001,11000-12000

#Web management multi-user login
allow_user_login=false
allow_user_register=false
allow_user_change_username=false


#extension
allow_flow_limit=false
allow_rate_limit=false
allow_tunnel_num_limit=false
allow_local_proxy=false
allow_connection_num_limit=false
allow_multi_ip=false
system_info_display=false

#cache
http_cache=false
http_cache_length=100

#get origin ip
http_add_origin_header=false

#pprof debug options
#pprof_ip=0.0.0.0               #debug pprof 服务端IP
#pprof_port=9999                #debug pprof 端口

#client disconnect timeout
disconnect_timeout=60            #客户端连接超时,单位5s,默认值60(5mins)
改完以后
按Esc
再输入:wq+回车
启动Nps:
nps start
5.当启动连接失败的时候
输入:
nps
(会有报错信息)
后台管理界面可以启动
输入ip:port
Windows 服务端安装步骤
下载安装包:从 GitHub Releases 页面下载
windows_amd64_server.tar.gz(对应 64 位 Windows 系统)。解压文件:解压到目标目录,如
C:\nps_server。安装服务:以管理员身份打开 CMD,进入解压目录,执行
nps.exe install,自动复制到C:\Program Files\nps并注册为系统服务。启动服务:执行
nps.exe start启动。访问管理界面:浏览器打开
http://你的服务器IP:8080,默认账号admin,默认密码123,登录后建议立即修改。
注意事项
安装后配置文件位置:Windows 下位于
C:\Program Files\nps,主要配置在conf\nps.conf。防火墙放行:需放行 Web 管理端口(默认 8080)和桥接端口(默认 8024)。
停止/重启:用
nps.exe stop和nps.exe restart管理服务。



发表评论